
5 Easy Steps to Cleaning Your Dryer Vent
One of the biggest home fire hazards is a dirty dryer vent. In fact, the combination of heat and accumulated dryer lint and dust are responsible for thousands of fires per year in the United States. And even if clogged dyer ducts don’t lead to household damage right away, clogged ducts will still waste your time, energy and money.
A dryer that is connected vents full of lint, dust, and dirt is not going to work well. If your dryer used to take one cycle or less to fully dry your clothes, but now needs two or even three, chances are it’s not your dryer that’s faulty — just grimy venting that’s the issue.
To keep your home safe and ensure that laundry day runs at peak efficiency, you should have your dryer cleaned at least once a year either by professionals or below we will teach you how the steps to clean it yourself:
1. Disconnect the dryer
-
- You should easily find the vent at the back of the dryer. The dryer exhaust vent will be at your home’s exterior.
- Unplug the dryer. If you have a gas dryer, turn the supply valve off while cleaning.
- Pull the dryer about a foot away from the wall.
- Disconnect the dryer duct from the back of the dryer.
Tip: Some types of flexible dryer hose made of plastic, vinyl, or foil are more likely to become clogged and cause fires. We recommend replacing them with ductwork that meets your local building codes.
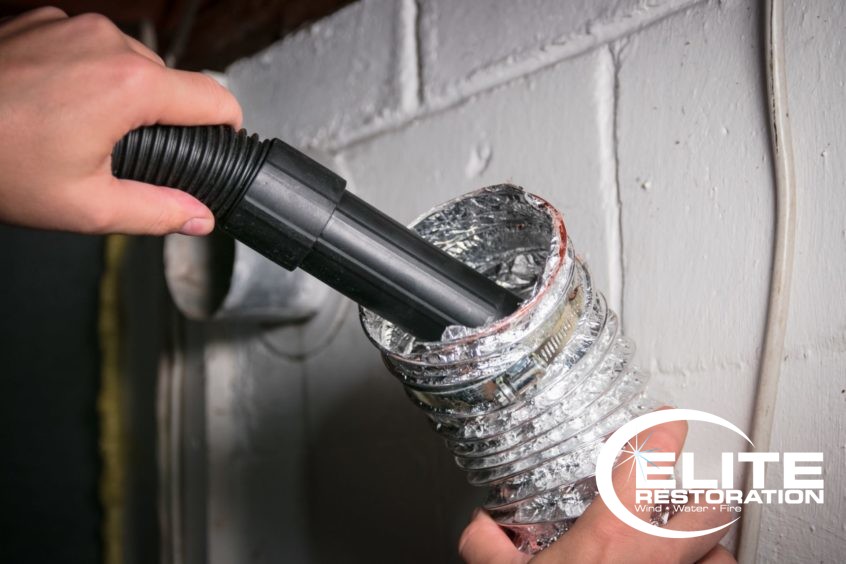
2. Vacuum out the vent
-
- Remove lint from the hole at the back of the dryer. Don’t forget to wear safety gloves!
- Use the hose attachment of a vacuum cleaner or shop vac to clean in and around the hole at the back of the dryer.
- If you can detach the duct where it meets the wall, go ahead and do so. It will make cleaning it easier.
- Remove lint from the duct by hand and then vacuum the inside of the duct.
- Go outside the house and remove the exterior vent cover and vacuum out the vent from the outside.
3. Brush out the vent
-
- If your dryer vent is too long to efficiently use a vacuum to remove the lint, you can buy a dryer vent cleaning kit for an alternate method. These kits contain flexible brushes with extensions that can be used comparably to more thoroughly clean the vent’s interior walls.
- Feed the brush into the duct and move it back and forth while slightly rotating it. Continue until the vents are free of dust and lint.
4. Reconnect the dryer
-
- When you’re done cleaning, inspect the ducts to make sure that they aren’t damaged and up to safety codes, and replace ducts if needed.
- Reattach ductwork and vent cover.
- Push the dryer back into place and plug it in or turn the gas valve back on.
- Run the dryer for 15 to 20 minutes on the fluff or air dry setting to make sure all the connections are strong and dislodge any remaining debris.
5. Take steps to prevent lint buildup
-
- Regularly sweep and dust the area around the dryer.
- Remove the lint trap filter and clean it out before every cycle. It’s quick, easy, and makes a big difference in your dryer’s performance.
- On a regular basis, remove the lint screen and vacuum in and around it.
- Dryer sheets can leave residue on a lint screen that can build up over time. If the lint screen is clogged, use a scrub brush to wash it in warm, soapy water, rinse it with clean water and dry it off with a towel.