
How to Keep Mold Out of Your Crawl Space
Most homeowners are aware of potential sources for water damage – basements, bathrooms, appliances, water heaters, pipes, and winter weather. But not everyone considers crawl spaces as a potential source. Water vapor rises naturally from exposed soil, which is the common flooring choice for most crawl spaces.
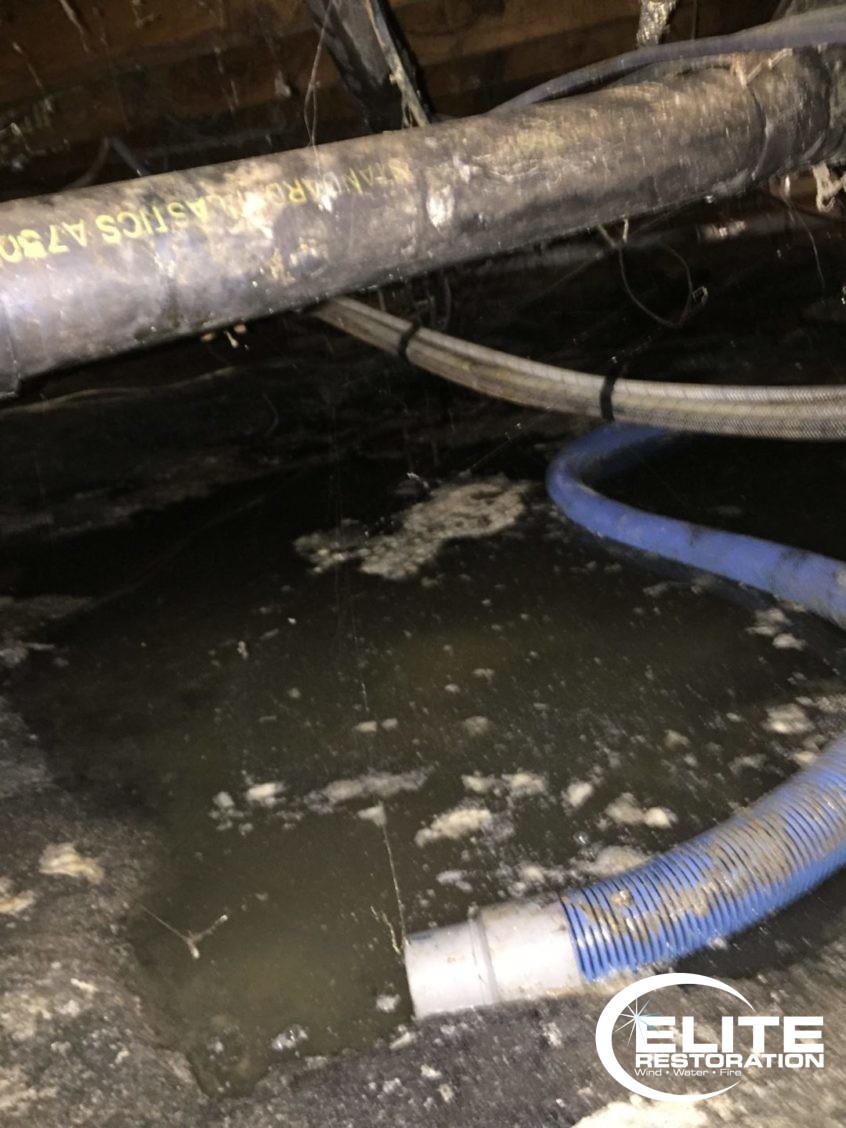
Moisture in crawl spaces can become problematic. In fact, it’s the most damaging in a crawl space than any other area of your home! This is because the crawl space is literally the ground beneath your feet. Problems can include mold, mildew, and fungi, which can lead to a number of health risks, including stuffy noses, allergies, throat irritation, coughing, wheezing, eye and skin irritation, and can even be fatal in some cases. Besides health risks, it can also negatively affect structural elements of your home by weakening or deteriorating materials.
Wood is an organic material, and this makes it particularly susceptible to rot. Joists, sills, posts, beams…all are made of wood, and wood exposed to too much moisture will eventually and inevitably rot.
Animals and pests can also become a major issue, as many are attracted to water and darkness – both of which a crawl space is known for. Ants, termites, rodents, snakes, skunks…even cats can end up in a crawl space, and this is never a desirable situation.
On top of everything else, the crawl space is always looked at during a home inspection. If there’s water damage, you may have problems when it comes time to sell your home.
Vapor Diffusion Barriers
Thankfully, there is a way to correct and help prevent moisture and water damage in a crawl space: vapor diffusion barriers.
Investing in a vapor diffusion barrier may sound expensive, but we assure you it’s not. Simply lay out rolls of ordinary sheet plastic. That’s it. You’re all done.
OK, there’s a bit more to it than that. But it shouldn’t break the bank and it may well be worth the time and money spent in the long run.
How to Install a Vapor Diffusion Barrier in Your Crawl Space
Gather supplies. You’ll need:
- Garden rake
- Portable work light and extension cord
- Trash bags
- 6-mil minimum thickness clear polyethylene plastic
- Double-sided butyl tape
- Poly PVC/construction tape
- Utility knife
- Tape measure
- Light source
- Make sure the space is as dry as possible. You can dry out your crawl space using a dehumidifier, fans, cleaning out wet material or debris, and can even use a pump if there’s standing water. This could possibly take a day or more, depending on what you find.
- Next, make sure the space is as clean as possible. Remove all debris, especially anything sharp as it could rip the plastic. If needed or desired, use a rake to level the ground.
- Roll out and cut plastic sheets. Begin at one side of the space. Lay the plastic down and roll it out over the entire crawl space. Cut the sheets to size, but keep it at least 12” up the walls the walls. Overlap seams with about 12” of plastic as well.
- Secure plastic with the PVC/construction tape.
- Attach to support beams. Cut the sheeting to fit around beams and tape it to secure. The goal is to provide a solid barrier against the ground.
- Cut any additional pieces to fill in gaps. Your goal is to create a solid barrier against the ground. Keep in mind of course that even when properly sealed, the plastic will not keep moisture out 100%, but it will slow down the process of water vapor coming up from the soil into your crawl space.